Showing posts with label biscornu. Show all posts

Thursday, May 31, 2012

Colorful May Freebie!

Sorry it's been so long since I posted an update...the month of May has flown by! Being the mother of a high school senior about to graduate is sure high intensity!  I finally found some time to stitch up and post my May freebie, so I hope everyone enjoys seeing it!  This one is called the Color Wheel Biscornu. I am still learning the ins and outs of my software and decided an exercise in color theory and selection would be a fun way to learn color picking. I have made it into a one sided biscornu. The back is only the corner motifs as you can see from the pictures. There are 12 colors in my wheel, based on the artist's paint pallet. Red, Blue and Yellow are the primary colors, mixing them in various combinations can give you a rainbow of colors for painting or thread dyeing. Tinting with white or shading with black can also add colors to your range, but I'll save that for another project!  My color choices came down to my own color vision preferences, so feel free to blend your own choices between the red, blue and yellow. This might be fun to stitch out from the center in a spiral using a colorful variegated thread too! The buttons came from the button aisle in my local fabric store, but any sort of button or bead would do. Fabric is a 32ct white opalescent lugana. As always, please respect my copyright and do not share my charts, but link to my blog. Let me know if there are any issues in downloading the patterns. Enjoy!

Get pattern here


Friday, April 27, 2012

April Sweet Peas and Bees!

Time for  another freebie!  This one I called "Bee A Sweet Pea" and has charts to make a biscornu and other accessories. Click here to download the pattern and key with instructions from the list, and as always, let me know if you have any problems getting the pattern. My model was stitched with a different alphabet font because I forgot I had to change it to my own lettering from the PCStitch 10 alphabet I was playing with when I first got the inspiration!  Believe it or not, my hexagon tile pattern on the bathroom floor was what inspired it back in February when I was wishing for spring! Sweet peas are the flower of April as well, so bees and sweet peas just cried out to be paired up! Feel free to make your own lettering or leave them off and use the bees instead.

I used the two squares for the top and bottom of the biscornu, and stitched it on 30ct Weeks Honeysuckle with  DMC. The bee buttons you see in the pictures are from Just Another Button Company. I'm going to make a heart shaped pin pillow with the sweet pea bouquet and single stitched bee. The pea pod and bees could be used for a fob or anything else you might come up with. I like making patterns with lots of interchangeable parts because that lets me and all of you use your creativity!


Back to my Chinese Garden Mandala this weekend! 

Thursday, February 16, 2012

Pawprints Freebie!

My second freebie, the one for February, is ready! It's a bit of a switch for Valentine's Day, because we all love our pets right?  I have put my own spin on the saying "Pets leave paw prints on your heart", and it would work equally well for dog or cat lovers.  I made a biscornu out of the design, repeating the paw print motifs on the back piece in the corners (as you can see in the pics). In addition, I made a simple paw print heart, which you could use for the back, or do what I did and make a little pin pillow or add a ribbon and hang it up out of paws reach! Click here for the pdf, and as always let me know if you have issues getting it. Only two colors were used, one a variegated pink DMC, the other is DMC 3350, a dusty rose. You can use whatever colors you like of course!  My fabric was a 28ct Confederate gray linen and I added a kitty face button on the front and a pink heart on the back. A frisky kitten left his paw prints all over the front!
I did not back stitch around the large paw prints, and think maybe I should have....live and learn!


Front

Back

Large Heart finished as pin pillow

Both biscornu and pin pillow!


Now I am working on my Chinese Garden Mandala again, which I am far behind on! I hope you all enjoy my new freebie! Please send pictures if you stitch it, and please share the link by sending people to this blog! Hope everyone has had a great Valentine's Day week!


Tuesday, January 31, 2012

Year of the Dragon...my first freebie!

Ever since I started my stitching blog, I have wanted to create some gifts for my followers, and here in the new year of 2012, and the Chinese Year of the Dragon, I have come up with this design for you all!  I hope to put out a new freebie every month this year for your viewing pleasure. Eventually, I hope to begin publishing my own patterns under the banner of Riversong Needlearts!  I have in the works more Chinese New Year animals, as well as many other ideas knocking around inside my brain. I am still learning my software and how to convert PCStitch Pro patterns to pdfs, so bear with me please!  Freebies will be available for your download, but please do not share the pdfs! You may direct friends to my blog instead. All the patterns I create are of course my property and under USA Copyright laws. I reserve the right to remove any freebie if abuse is noticed. Free patterns will be up for one year and then will be added to my catalog for sale once my company is up and running.  Please let me know if you like what you see, and please send me pictures if you stitch this or any other forthcoming pattern!  I'm willing to take requests on small designs, but cannot promise success quickly!

My creative process starts with Google Images. If you add the term "free rights" you get hundreds of clip art and free design motifs one can use with a clear conscience. This design is a compilation of several image motifs I used for inspiration, including a border motif and a Chinese Dragon figure with horns. From there is was just a matter of creating the border/corner sections and adding a fierce dragon face. The final size is 50x50. A gold backstitched line is added only if you wish to make a biscornu as I have done. I have stitched it on 28ct black linen, but you could use any color or count, even Aida, as there are no fractional stitches and only a little backstitch.

Please click here for the link to the pdf, which includes the key and other information about the chart. Save it to your computer and then print. You may need to use the snapshot tool to enlarge the chart, I certainly did! If you click on the first pic below you will see the chart clearly, and could right-click and save I think. You will not have the key unless you use the pdf. Still, a couple of quirks to figure out, including how to get the colors of the stitch blocks to show on the key with the symbols. Let me know if there are any issues with getting the pdf, please!

My stitched dragon.....
In order to make it into a biscornu, I stitched the red border/corner sections again to use for the back. You can add your personalization there as I have shown below. I left off any bead or button to make it dimple. The shape of the biscornu is what makes the finish I believe! You can add a ribbon hanger if you'd like.

Because someone has had issues getting to the pdf here is the floss list.


DMC 726 topaz -lt
DMC 725 topaz
DMC 783 topaz - md
DMC 816 garnet
DMC 780 topaz - ul vy dk
Backstitch Lines
DMC 783 topaz - md
DMC 816 garnet


Friday, December 30, 2011

Wrapping up 2011...

Happy New Year of 2012 to everyone!  Hope all of your holiday celebrations were happy ones! I guess I need to wrap up my stitching year with some pictures of several projects finished up these last three weeks. Jo asked for a picture of all the tiny biscornu necklace fobs, so here they are....

The one for October is not so tiny, but hey, I like it!  My college class ring is beside the first one so you can see how small they are. I was working on the last one and got many comments at the stitching seminar, and a few people wanted instructions! Earlier this year I did do a tutorial on biscornu finishing so I hope that helps anyone who wants to try their hand at wearable needlework art. My final results for 2011 included 44 completed projects (2 were gifts), and 18 of those projects were also finished off as biscornu, ornaments or pillows. I still have 8 WiPs and 10 UFOs. For 2012 I am going to try and get 2 more WiPs completed, and attempt some designs of my own for the monthly biscornu series, so keep visiting!

On to the JCS Christmas at Williamsburg Needlework Seminar....this year was the 25th annual event for Hoffman Publishing, the publishers of Just Cross Stitch and many other crafting magazines. The event does lean in the direction of samplers and reproductions, but this year I took the class with Barbara Jackson of Tristan Brooks Designs. The piece is a traditional crewel Jacobean design of a strawberry motif for a needle book and fob. Barbara is an experienced surface embroiderer with training from the Royal School in England, and taught us some of the tricks of the trade. I learned that "crewel" refers to the type of thread used, which is usually plied wool, although any fiber can be used.  We basted muslin to the back of our linen ground fabric (and stitched right through both layers) to give more strength to the piece, which is meant to be used. She went over each stitch, from stem stitch to long and short, to split stitch, lazy daisy, bullion, tied fly, and satin stitch, and yes....french knots! Here is a close up...
The design is very lightly sketched on the linen for us in the kit, and blue dots of washable marker are there to outline the shape for finishing. I still have to remove them and assemble the two parts of the set, the needle book/scissor keep and a separate scissor fob.  I really enjoyed doing those yellow bullion stitches!
This is the completed front cover of the book (upside down), and will be stretched over acid free card stock (which she found at a comic book store!) cut into a heart shape. The hinge will be on the top edge. Inside is a fold of felt and a pocket for some tiny scissors. The back and the fob are here...
I actually added a strawberry to the back so my poor attribution would not look so sparse! The fob is folded and hem stitched with a bit of fluff. Here are some close up pics....

All that is left to do on this is to do the finishing!  The instructions are clear, and Barbara went over them in class, so I feel pretty sure I'll be getting it done soon! I would recommend her as a class teacher wholeheartedly, one of the best teachers I've had in fact!  Since I was in a "crewel" mood, I decided to finish up another embroidery piece from a previous class with Catherine Jordan. This is her Tree of Life Journal Cover, and I just had to finish up the back and hem it and it's now done completely and covering a tiny 3x4 inch blank journal! I put the title and year (in Roman numerals) on there as well as my initials hidden in the grass. This little journal is going to be saved for very profound thoughts indeed!

I was in need of an idea for my Mom for her Christmas gift (she is 87 and really hard to shop for!) so an exclusive design from San-Man Originals for the members of her bulletin board magically appeared (Thanks Sandy!) and insisted I stitch it!  I used opalescent fabric to give it a snowy sparkle and will make a little banner for her door this weekend....in time for the new year, of course!
Now I am working on the 2011 Prairie Schooler Santa as my last project of the year...hope to finish stitching it by tomorrow.  I also have another picture I want to share...a few months ago I saw a blog somewhere, and the blogger was showing off her "flower frog" that she was using to keep her scissors safely stored away in.....and I just HAD to find this "flower frog" thingy, whatever that was!  Not a frog at all (tho' a flower frog FROG would be so appropriate for sewing scissors don't ya know!), but a glass bowl with a top that has holes for arranging short stemmed flowers like pansy blossoms. And, through the power of eBay, I found this lovely blue glass bowl and took this picture. Now I have to round up all the other little scissors to keep in it!  LOVE IT!

May everyone have a safe and happy New Year in 2012 and be sure to come visit me often!

Monday, October 10, 2011

In Halloween mode!

Halloween is so fun to stitch for!  I have three new finishes to show off....first, a kit from Trail Creek Farm called Halloween Cats. The pillow and stitchable cover come with the chart and floss, so it's a quick stitch. I did have to stitch most of it in hand because it was hard to use my usual q-snaps inside the cover. I gave the cats different faces for some humor. I didn't really like the charted faces so uses some backstitch and french knots instead, and left the words (Halloween Cats) off, as I thought it was cute without.
Next is my monthly biscornu necklace fob, from a chart by Jemini Designs called ScareCat. I stitched it over one and added a border to be able to finish it as a biscornu. It is about 1.5 inches, a little bigger than the others.
Last night I finished another Halloween pillow, this time by SanMan Originals, called Halloween Hoot Night.  Sandy even made the tuck pillow with the round opening!  It turned out really cute on 28ct Silkweave solo linen. This little owl looks like he got into the cider and had too much!
Now I'm back working on the Chinese Garden Mandala.....more later!

Tuesday, September 6, 2011

September's tiny biscornu necklace

Well, the Labor Day holiday weekend was pretty busy, but I managed to stitch up my monthly tiny biscornu over the weekend so I can go back to the Chinese Mandala!

It is a little flower motif from the blog of Anne-Marie called Brodstitch. I stitched it over 1 so had to adjust a bit since it had fractional stitches. It is just about an inch and a half across.

Thursday, August 11, 2011

August Biscornu Necklace Fob

Stitched this up yesterday, easy peasy, and quick!  It is from the blog of Francois Sablaise, saved a while ago from her April 2009 post. She called it Pendouille Avril 2009, I call it a biscornu necklace fob!
First the two sides before assembly...stitched with DMC 564 and 778 on 28ct pearl linen.
Here it is, assembled and on a silver chain...front side.
 And the back side, on dramatic black! It is one and a half inches across.

Wednesday, July 6, 2011

Tiny biscornu break...

Took a break on July 4th to stitch a tiny biscornu fob for my necklace. Being a patriotic day here in the USA, I used some red, white and blue floss, Week's Independence, and 28ct Ray of Light lugana in pale yellow. This little guy is just over an inch across, stitched over one. The pattern came from the Stitch Creations blog here. I used two tiny white seed beads to dimple the center and sewed on a bail for the chain.
By the end of the year I'll have a biscornu necklace for every occasion!  Now to find a suitable August-themed pattern in a small size!   Back to the Chinese Garden Mandala for the rest of the week. Hope everyone is having a nice July!

Saturday, June 18, 2011

June's tiny biscornu complete!

First off, I want to thank everyone for the kind wishes in regards to my knee problem. I got a cortisone shot and it feels much better! Unfortunately it's just my arthritis acting up and not much else can be done. The price of getting older, alas!

The month of June brings a new tiny biscornu for my necklace collection!  This is from a freebie by Janie Hubble called High Tea and Petit Fours. She finished it as a teacup pincushion, but  I stitched it on a scrap of 28ct Silkweaver Solo lugana over 1 and it ended up being just about an inch across!  I did not add a bead dimple because it was really too tiny and I had nothing that would work without hiding most of the stitching. Here it is before assembly.....
And here is the final product...
Still thinking about what pattern to use next month.....something red, white and blue no doubt! Before stitching this little cutie up, I was working on Chatelaine's Holland Landscapes. I finished the last window scene of the lighthouse, but still need to add the tulip garden over it and I'm stalling because I have already stitched the tulips three times! The drawback of a mandala....;-) I will probably pull out another small to take with me to my Dad's tomorrow...we are visiting for Father's Day...and I need something to do in the car for an hour each way.  More pictures coming soon and hopefully back to the Chinese Garden before the end of the month!

Thursday, May 5, 2011

Two small projects before a new start to come!

Finally able to get a post up with my last April project and the first one of May!

I had another Kitty Kalendar monthly kitted so I did that while watching THE WEDDING festivities...I'm sure you all know what that's all about! Such a nice distraction from the woes of the world and before reality hit again on Sunday. At any rate, this one is August, stitched on another 28ct Silkweaver Solo with called for Weeks. Longing for some sunny days now!


Sunday I whipped out another mini biscornu necklace fob, this time with a pattern by Janie Hubble Designs (formerly Cat's Whiskers) http://janiehubble.com.au/
This is Peacock Feathers, a freebie you can get by signing up for her newsletter. Once you are on the list, you will receive the current newsletter link, and can access the newsletter archives, where other freebies are offered. Of course, to make it small for wearing on a chain, I stitched it over one using one strand of Gloriana's Tropical Seas. It's just over an inch across!


Next month I'll be using another of her freebies from the May newsletter, called High Tea!


My new start was my birthday present but I had to wait for the supplies to arrive from ECC...it's the new Chinese Garden Mandala from Chatelaine! My rotation has been working so well this year, I decided I needed a reward...another BAP! Watch for my first WiP picture later this month....;D

Monday, April 4, 2011

April's Tiny Biscornu


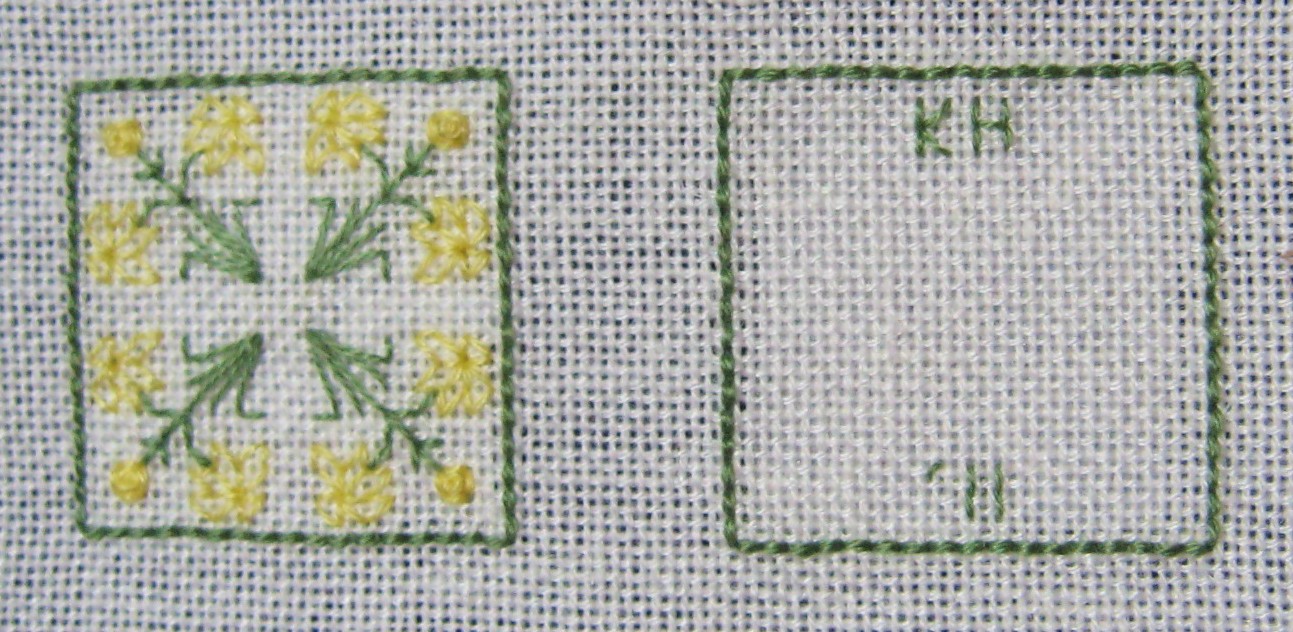
Over the weekend I stitched up another tiny biscornu from Tor Rhuann, the Daisy Garden. The fabric was a scrap of 28ct linen called watercress, thread from leftover kit floss. (always frugal with thread around here!) On the back I added little flowers of my own, inspired by the lazy daisy stitches on the front, and used french knots in the flower centers as contrast. You can see by the needle that this is really tiny, about an inch square!


This completes Belinda's Getting Squared Away series. I now have four tiny biscornu to wear on a chain! I will be going in search of more tiny patterns (16 stitches square or so) in my stash and on the web.


Now I'm going to spend a little time stitching on my Rose Garden Sampler at least until it's time to go down to the DMV and renew my driver's license....just like me to wait until the last day (my birthday!) to get it done! If it's not stitching (or reading) I just put it off. Going out to dinner with my hubby and daughter tonight, then stitching the evening away!

Tuesday, March 8, 2011

Tiny Daffy Biscornu!

Last night I sat down to watch tv, and by bedtime this tiny biscornu was done!
Stitched on a scrap of 28ct pearl linen, with leftover threads from another project. Design is a freebie from Tor Rhuann Designs.

My third tiny biscornu made into a necklace....it is small enough to fit in the blossom of a daffodil flower!

I have daffys and jonquils blooming already in early March! This little daffodil biscornu fits right in don't you think? Happy Spring!

Friday, February 4, 2011

Biscornu tutorial!

Yep, I did another mini biscornu, and this time I took some progress pics so I could write a tutorial on how to make the little critters! I should probably not say "little" because I've made one that is big enough to serve as a sofa pillow before, although most are in the 3" range.  I spent the weekend doing some hand stitching on my JCS class project, and was at a good stopping place to rotate on to my February biscornu, so here you go.....


This biscornu is another freebie from Tor Rhuann Designs, under Getting Squared Away. It is just 16x16 stitches and is called Entwined Hearts, perfect for Valentine's Day this month! I used 32ct Zweigart Baby Lotion linen and Crescent Colors Ruby Slippers thread. The center beads are real red coral beads from a rock shop in upstate New York.


After stitching the design, and backstitching around it (two threads out), I made the back by using the little corner motifs and adding my initials and the year ('11).

Then I cut them apart and added some small squares of iron-on interfacing to the backs of each side to give them some stability. They should not cover the outer backstitch lines. Trim the edges to remove bulk before you start, but not too close.

You should then finger press the edges along the bs line, and align the parts as shown, with the corner of the front lined up to the top edge of the back, at the center. That will make the back upright. The front on this piece is symetrical, so there is no "top edge".


Start whip stitching thru the loops of the bs line, matching them up as you go. Here is where you realize that the pattern should be square with sides having the same number of stitches in order to match up correctly.

When you come to the corners give an extra whip into the last stitch on the side, and the first stitch on the new side, just to reinforce the corners.


Keep traveling around the edge, whip stitching as you go. If you would like you can add beads every other stitch as you go to give it a nice edging.


Here you can see I have gone about half way around and the biscornu is beginning to take shape. You can also see how the interfacing makes it stiffer and easier to stitch around.


From a different angle....


If you peek inside now, you can see how the raw edges collect in the interior corners.


Nearing the end, you can see the points are staying sharp and crisp.

Take a small amount of fiber fill and poke it inside...

It won't take much on this tiny biscornu. Larger ones you can pack loose or tight, your preference.


Once you reach this point, with only two sides left to whip, it can get a little fiddley. I tuck in the long straight side first, stitch to the point and tuck in the final edge, reinforcing the corners and final connection well.

It is now completed closed. I finish at the same place I started, so now I sew on a necklace "bail" at the point. You can find these "bail" rings in the jewelry section at Michaels or AC Moores. If you want to use it as a scissor fob, add a cord or ribbon just before you close the final few stitches and make sure it's secure.


At this point, you can add a bead or button to the center by threading thru each side's bead two or three times and pulling the thread tight to dimple the center to your preference. If you'd rather leave it un-dimpled that's okay too!

Mine is now done, with a chain added to wear as a necklace!

Here are both tiny biscornu I have made....so far! I plan to make one each month this year, and I will then have a complete set of interchangeable necklace fobs to wear year round!